
This article is NOT about building a microphone. It is about building an on-camera microphone mount.
This is my microphone. Clearly, it is a homebuilt DIY job!
When I started making video, I used the on-camera microphone, as most people do. As I learned more about youtube, I learned that good audio is one of the most important things. So I needed an external microphone. This microphone was built by John Heisz from the ibuildit.ca website and youtube channels. He was experimenting with microphones for a while. He was kind enough to send me this one when he was finished with it, and it has been my microphone ever since.

An overhead microphone, close to your head/mouth, is the best. So I first built a ceiling-mounted boom to hold the mic. It worked well for audio, but it did NOT work well for logistics. When the microphone is attached to the ceiling, but the camera is on a mobile tripod, things just don't work well. I was yanking on cords way too often. So I hacked together the on-camera mount shown above.

I had a small aluminum plate at the bottom of my mount which would slide into the camera hotshoe mount. But it did not lock into place, so it has always been a bit loose and precarious.

Eventually I decided to buy a microphone, as I thought it would be better. Rode is a popular name, so I picked up this Rode VideoMic Go. (This is an instagram photo, so it's not the best quality.)
It is nice and compact, and mounts securely to the camera. However, I was shocked to realize that the sound quality was really no better than my homebuilt hack job microphone. In fact I thought the homebuilt mic was better on a few shots.
So I returned the Rode microphone. If it's no better, I might as well keep my money! Instead I resolved to improve this homemade microphone mount. (I had also seen an instagram post from Jer's woodshop which inspired me, as he was also hacking on a homemade microphone boom.)

First I picked up this hotshoe mount from Amazon. It was only about $3-$4, and it will help my mount to fasten securely to the camera.

I thought about fancy sliding dovetails to make this adjustable. I thought about wing nuts, and clamping methods. I thought about how to cut slots to allow nuts to pass through.... I thought of all of that and decided to skip it all and go for basic simplicity.
This is a microphone that stays in my shop. Most of the time it is quietly sitting horizontally mounted on my camera. Only rarely, in fact, will I even want to extend it outward. (at least, I think.) So I decided to try for a simple friction-fit design with NO hardware and NO fancy clamping.
I had some thin strips of ash in my stash and I glued some bits together to make a hollow beam like this, and then another piece (seen on the bench in the photo) would slide into the beam, to make it extensible. The one side of the beam actually curved inward a bit (I have no idea why) when I glued them together. This helped with the friction-fit of the boom.
The thin would also means that this can stay light. Light is key, as this will be mounted on top of my camera!

The ash strips are quite thin. At one end I need to drill a hole for mounting the microphone. I'm worried about it splitting, so I added another piece of thin scrap and glue it to the end in a cross-grain orientation. (The grain of the tiny bit is oriented at right angles to the grain of the ash). This should add a lot of reinforcement to that area.

I traced the base of the old one on some light pine, as that shape seemed to work ok. And Pine is light. I then drilled a hole in the bottom, so that I could mount a 1/4-20 T-nut into the bottom. That is where I will be able to attach the hotshoe mounting bolt.
(Remember to pre-drill small holes for the "spikes" of the T-nut or your base will probably split. That's what happened to my first one. I mistakely thought that the soft pine wouldn't split. Wrong!)

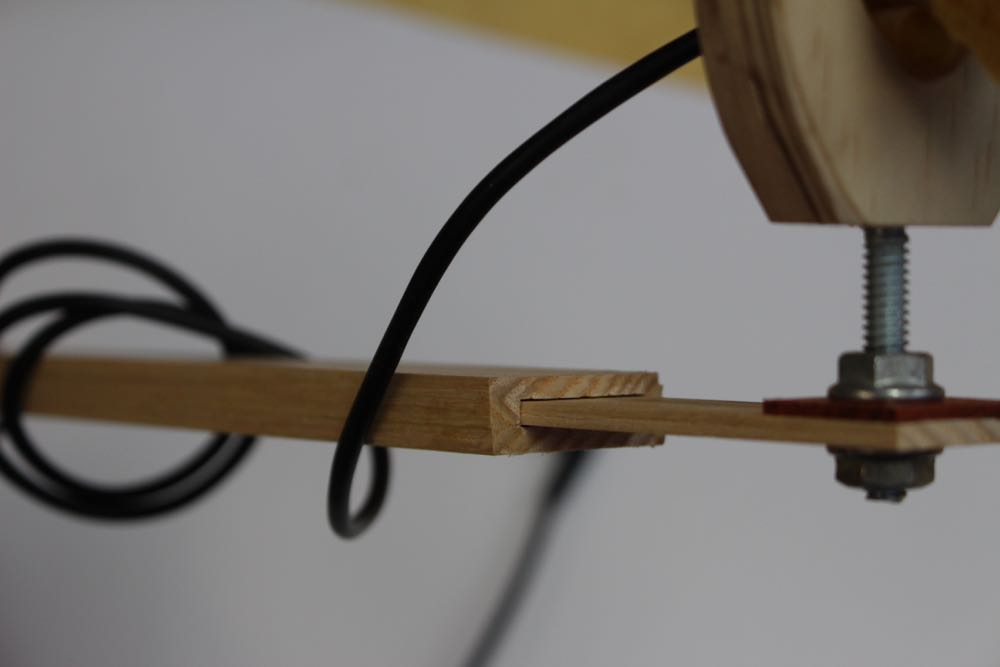
And that is about it. I screwed the hollow beam to the base. I added the hot-shoe mounting-bolt to the base. I mounted the mic to the end of the boom, and I put it all together and it looks like this. Here is a photo of it with the boom inside, and another photo with the boom extended. There is also a photo showing a closeup of the connection.
I also made a second boom that was longer. This can easily be swapped with the main boom, if I ever want to be able to extend the microphone even further.
The shorter boom will normally project about 14" forward when closed and 24" when extended. The longer boom will extend the reach of the mic out to about 30".

Some of the Tools/Supplies Used In This Project: (Affiliate Links)
other Neewer hotsoe mount options
Rode Video Mic Go (If you don’t want to DIY)
Stanley Leverlocks -- love these tape
measures
Other auto-locking tape measures
Bessey small 4" clamps
Bessey VarioClippix, Adjustable Spring
Clamps
As an Amazon Associate I earn from qualifying purchases you make using my affiliate links.

