ABOUT THE VIDEO:
I wrote this article, and the companion article, in 2013, before I
started making youtube videos. Later in 2017 I produced a video
wherein I made some more picture frame stock based on this design.
I have NOT changed the webpage, but I am including the video here as a
supplement to the article.
This is "Part II" of a frame project begun last month:
Designing Picture Frames
In "Part I", I wrote about the design aspect of this project.
Now that I've finished making the frames, here is a photo essay
showing the construction and assembly.
After the stock was prepared (selected, jointed, planed to thickness,
ripped to width) the first step in producing my design was to plough a
shallow dado in the frame. All frame pieces are treated the same.
The fence was then moved over a quarter inch and ploughed again.
Take note of the pile of stock on the right side of the saw. I am
writing about two picture frames, but I decided to make a third for
another use at the same time. In projects like this, the tool setup
is the largest part of the work. Creating a bit more frames pieces
requires very little incremental work. I actually have enough extra
for at least a fourth or fifth frame, depending on the size.
The result of that are two shallow grooves in the stock.
(PLEASE NOTE: These grooves are delicate. During
the construction I found that they chipped out a bit too easily when
cutting the miters. Next time I would perhaps try spacing them a bit
further apart, or maybe just cut one. I just wanted to warn you about
this.)
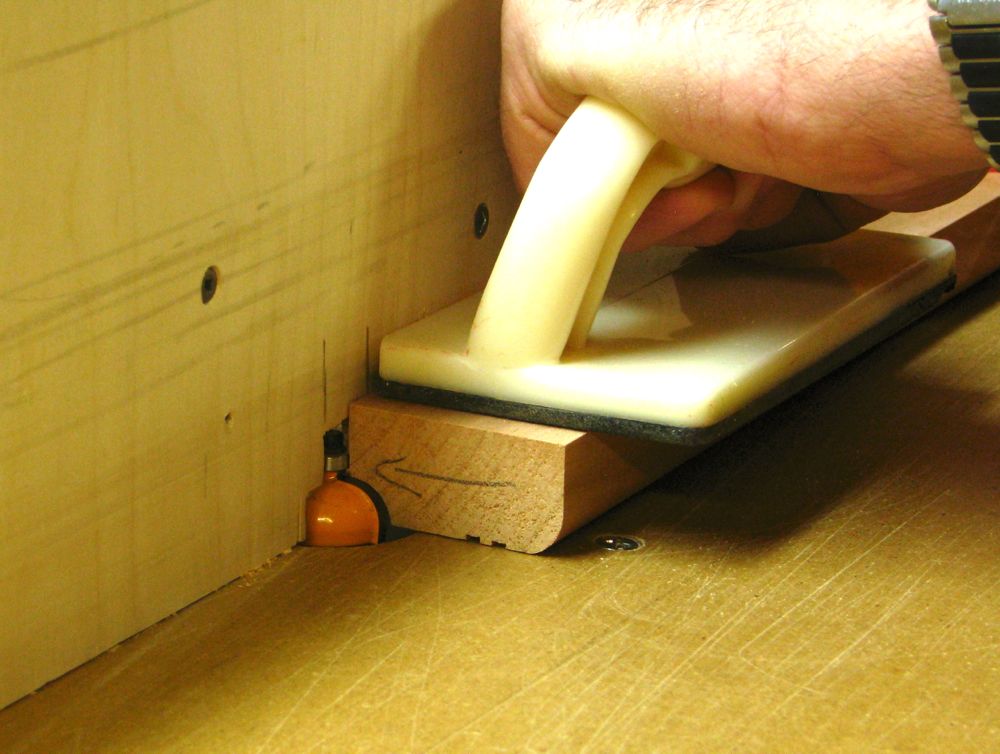
Next step is on the router table. I used a 3/8" roundover bit to cut
the outside curved profile.
Change router bits for a cove bit to cut the inside profile.
Note that both these cuts, the cove and the roundover, are cut in
several passes, each time cutting a bit deeper.
The photos show the tool setup for the final pass.
I don't show cutting the rabbet along the inside edge of the frame.
The size and depth of that depend on what it is that you are framing.
Once I am finished cutting all the frame profiles, I can move on to
actually assembling a frame. I used a 45-degree crosscut sled that I
built for my tablesaw. This does an awesome job of cutting miters
that meet tightly and produce a 90-degree frame.
I measured the picture and used that to cut the frame pieces to size.
I allow approximately 1/8" (3mm) of extra in both directions, so the
picture fits, but not too tightly.
Clamping a picture frame, or anything with 45-degree angles, can be
tricky. A good tool here would be a strap or band clamp.
Unfortunately, I don't have one. I tried just using my parallel
clamps, but the frame slipped -- fortunately before the glue set up --
and I had to come up with another option.
I own a Dowelmax dowelling jig, and that proved to be a fairly quick
solution for my situation. I used the dowel jig to put one 1/4" dowel
hole in the face of each joint. I don't need them for the strength,
just for the alignment. The other three pieces are lined up on the
bench ready to be drilled.
After the holes are drilled, I always perform a test fit. Fluted
dowels can be a tight fit, so I have a set of dowels that I squished a
bit with a wrench that I keep set aside for the dry fits. I use
"fresh" dowels for the actual glue-up.
Close-up shot of one of the joints.
I apply some glue inside each dowel hole, slip in a fluted dowel.
(I use compressed/fluted dowels which expand when in contact with
water based glue.) Then apply glue to the face of the miter joints
and close up the joints. The dowels force the joints to stay aligned.
The clamps can then be tightened just a bit to hold things tight and
square as the glue dries.
For finishing I wiped on one coat of sealcoat shellac, followed by two
coats of waterbased varathane. I was tempted to just use some spray
lacquer, which would be quicker and look much the same, but we are
having a -15c cold snap right now, and it is far too cold in our garage
to spray lacquer.
That is about the end of that. All that remains is to hang the
paintings in their new home. And as a bonus, I have some frame piece
already prepared in storage for future framing needs.