Here is a short photo essay on one method for repairing a broken spindle
in the back of a chair. I will drill out the broken piece and fit in a
section of dowel. The method is quite similar to how I have repaired a broken spindle
on my stair railing.
My wife brought me this chair the other evening, showing me how the spindle
(which I'm holding in the photo) had broken off right where it passes through the
seat.
There's nothing fancy about these chairs, they are just basic kitchen table
chairs. I've had them for over 25 years. I bought them when I first moved out
of the house, to go with a table that my dad made me. I bought them at Sears.
They were made in Malaysia, just FYI.
You will see broken chairs like this out on the curb for garbage pickup
regularly. But it this case, it is actually a fairly simple fix.
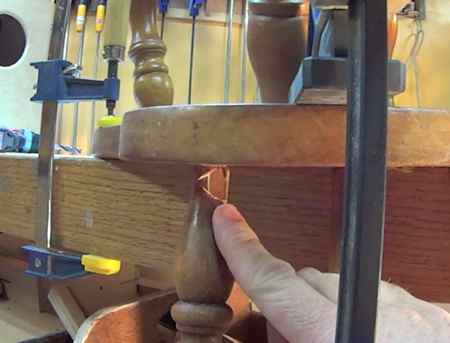
Here is a blurry close-up of the situation. (Sorry, it's a zoomed screenshot
from the video.)
The plan is pretty simple. I will drill out the broken stub of the spindle from
the bottom of the chair seat. I will then continue drilling into the bottom of
the broken spindle. Finally, I will fit in a short section of dowel and glue it
into place.
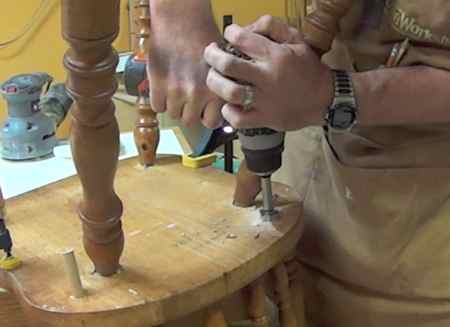
Here I am starting to drill through the dowel. By accident I grabbed the 7/16"
drill bit. I had intended to use a 3/8" drill bit. The leg of the chair is
unfortunately just a touch too close, and it is forcing me to drill at a slightly
wrong angle.
Unfortunately, I blew out the side of the spindle while drilling. That is mostly
the fault of the drill being pushed aside by the chair leg. No matter, this is
on the backside of the spindle, and I should be able to shape and stain it once
installed.
With the breakout in the spindle I didn't want to drill any further, so I
switched to a 1/4" drill bit and extended the hole another inch or so into the
spindle.
I also widened the hole to 1/2" in diameter, as I had some 1/2" dowel stock
available.
I also drilled a 1/4" hole in the end of the dowel. The new plan was to glue the
1/4" dowel into that hole, which would then help with joining the large dowel
with the chair spindle.
Gluing the dowel assembly into place. I used 5 minute epoxy, for it's strength
and gap-filling abilities.
Here is the results of the fix. The dowel is visible, but only on the backside.
We can fairly easily sand and stain that to match the chair. More importantly,
he inserted dowel is strong and has successfully rejoined the spindle to the
chair seat.
But Wait! There's More!
(Words you don't really want to hear in this sort of situation.)
During the course of the fix I discovered that one of the smaller spindles was
also broken. Those spindles do not penetrate all the way through the seat. But
with some measuring and estimating, I have a pretty good idea where the spindles
would emerge.
I would use a large 1" drill bit (That is the largest diameter piece of dowel I
have, so that I can use it to plug the whole later.) to drill an exploratory
hole in the bottom. I would drill slowly, stopping frequently to check, only
until the bottom of the spindle is revealed. I would then drill a smaller hole
into the spindle, to again fit in a section of dowel for repair.
Here is the bottom of the broken spindle revealed.
I then switched to a 3/8" drill and proceeded with drilling into the bottom of
the spindle. I then glued in, again with epoxy, a length of dowel.
I decided that it would be stronger if I left the 3/8" dowel as long as possible,
extending all the way through the chair. To plug the hole then, I cut a section
of 1" dowel and notched it to fit around the other dowel. Once again, I filled
it in with lots of 5 minute epoxy.
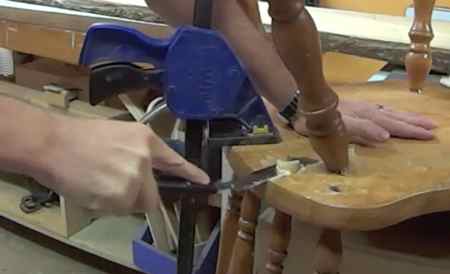
Once dry I cut away the excess with a flush-cutting saw.
And here is the result. On the left you can see where the one dowel was cut off.
On the upper right you can see the dowel-within-dowel cutoff from the second
spindle.
So, was this a beautiful heirloom quality invisible repair? Not a chance. But
then again, it is not a beautiful heirloom quality chair either. It's just a
basic kitchen chair, and I'm happy that I was able to fix it so we can get a few
more years of use out of it.


